Saturday, December 19, 2009

Christmas Knitting - part 1

Have you ever knitted a potato-chip scarf?  Ever heard of one?  A friend of mine told me she was making one and so I had to go on Google and find one, too.

I found several patterns -- and the name can mean a couple things.  One, it looks like a long curly fry.  Two, you can't stop at just one.

Basically it is a knitted flounce that can be worked to any length.  The first pattern is done on a circular needle and casts on anywhere from 50 to 110 (or more) stitches.  The scarf is knitted in garter stitch a total of 8 long rows, with every other row doubling the stitches by knitting an increase in each stitch.  Another pattern casts on only 20 to 24 or so stitches and is worked in a series of short rows (stopping part way and then turning the work and knitting back to the beginning of the row).

The problem I had was determining if I had enough of any one yarn to work the long scarf.  It is definitely the eaiser pattern since you don't have to do any counting -- just sit and knit.  I figured if I did the short-row version I could just keep knitting until it was the length I wanted or I ran out of yarn.

So I did a test of the first short-row pattern.  I have ~240 yds of a discontinued yarn -- Sensations Carlo that is described on the label as a "versatile shimmering tape yarn."


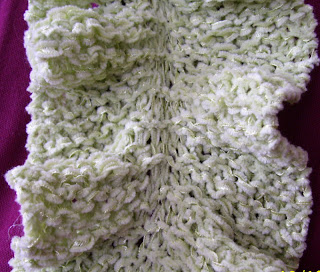
The pattern beautiful and actually makes a double flounce.  But I could tell I didn't have enough yarn to make a scarf long enough to be usable.  Maybe I could make it long enough to attach to a garment as a collar .. but that's not my style.


I have another pattern I am going to try -- later, after the holidays -- that will make a single flounce and I will be able to use all the yarn to whatever length it ends up being.  But, I wanted to make a gift and the giftee's (is that a word?) favorite color is blue.

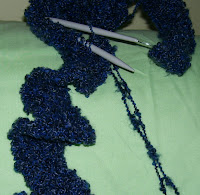
So I found some yarn in the stash that had plenty of yardage and is a combo of blue & black -- so good to wear with jeans.  I decided to cast on 90 stitches (size 11, 36" circular needle).  On the increase rows that became -- 180 -- 360 -- 720 stitches -- and ended up a length ~5 ft total.  I did a sample starting with 10 st (20 - 40 - 80)  to make sure I would like the end effect with my yarn and needle size (tried a couple different needle sizes so I'd know what size to buy in the 36" circular)  and then worked on the real one.  You don't see the flouncing effect until you are finished and start to bind off.


and VOILA -- the finished scarf -- ready to be wrapped and shipped ....


This was an easy project -- one row all you do is knit.  The next row you increase by knitting in front and back of each stitch.  No counting!  But by the end if you can't work an entire row in a sitting, with the yarn I was using (Yarn Bee, Boucle Traditions) it was hard to tell if I was on a straight knitting or an increase row.  So when I would leave the work, I would leave myself a note stuck to the needles.


Since I have another ball of this yarn -- I am going to make another for my daughter to go with her new black jacket ... and then I'll work on my green one ... and then ... (can't stop at just one!)

Wednesday, December 16, 2009

Christmas Sewing -- part 2

Last night I attended the Christmas party for my neighborhood ASG group and decided in the morning that I should have a new top that looked a bit more festive than anything in my closet. 

So armed with $4 worth of Wal-Mart bargain table crushed velour knit that I had just picked up two days before for the stash and my TCC software, I printed out a new t-shirt pattern with a bateau neckline.

I had already decided to wear either my rope pearl necklace or my chatelaine that a friend made me a couple years ago.  My pants choices were brown or green -- and the chatelaine is green -- so ... no brainer... the chatelaine it was!  (and ASG members would recognize what a chatelaine actually is!)  Since that would definitely be the "star" of this outfit, I decided on a bateau neckline.

It went together very well.  Based on my Sewing with Knits book by Connie Long, I used 5/8" seam allowances and the Dual Feed (walking foot) on my Janome.  Another tip I used (credit to Linda Lee) was that I pressed up the hem allowances before stitching the shirt.  That was easy to do at the beginning of the project and it made the finishing go much quicker.  Little things sometimes mean a lot when you are under the gun for time.


 The top was very comfortable and just right for the occasion.  Will I wear it often?  I think not ... but now it is in the closet the next time I need "dressy casual."  Since it is a neutral off-white it isn't limited to Christmas.

I need to double check my neck width measurement in my chart and the relationship with the shoulder length measurment.  Looks like I changed one without changing the other and the software thinks my shoulders are wider than they are.  So not the perfect fit that I would like but definitely a better fit for me than rtw since the accurately located darts help add shaping and the top skims the body.

The picture was taken after I got home and had been sitting all evening in the poly gabardine pants -- so all in all a little rumpled .... but "it will do."

Sunday, December 13, 2009

Christmas Sewing -- part 1


I wanted to make something special for a few special friends and decided to use the jewelry bag pattern from my TCC software.  This was completely at default and when I make mine, I think I am also going to size it down to have a second, smaller bag for earrings only.

When open, this bag is 14" across and contains lots of little pockets to hold earrings, necklaces, bracelets ... whatever!


It also has a little padded bar that can hold your rings, hoop earrings, and bangle bracelets.

The fabric I used is great in person but havoc in the picture.  It is a brocade that is shiny satin on the right side and a lovely matte on the "wrong" side.  I used the matte for the outside of the bag and the top ruffle, and the lighter satin on the inside of the bag so it would be easier to see the pieces of jewelry. The matte side is one of my favorite shades of green (celedon) and the inside contrasts with a silver-ish white.

The first one I made at our April workshop is out of a floral cotton that is great to look at, but difficult to see the contents of my bag.  So I learned that the inside should be in light colors and a subdued print or solid color.

If you don't open the bag fully, you can set it on the dresser top and it acts as a nice little traveling jewelry box -- holding its shape while holding your treasures.  Here's another "aerial" view.


I didn't take time while I was making these to do step-by-step photos, but will try to do that with the one I make for myself.  I'd like to show all the cool tools and techniques I used in building the bags.  Meanwhile, all three of these have gone to good homes.