Showing posts with label style show. Show all posts

Tuesday, September 14, 2010

Scarlett, eat your heart out!

Scarlett O'Hara may have had green velvet ... but did she have bead trim?

This is my last (hopefully) garment for the style show; there is possibility of one more but I am hoping that that one is canceled.

The particulars -- a TCC sheath dress with an envelope collar and a loose sleeve shortened to just above the elbow.


Some techniques I learned with this dress --

  • how to cut continuous bias strips
  • how to make piping
  • how to sew on beaded trim


Some other things I learned with this dress --

  • It probably is NOT a good idea to use home dec fabric (ie drapery fabric) for a garment -- no matter how it turned out for Scarlett.  I used a whole bottle of Fray Check around the cut edges before I even started to work with the fabric.  I was afraid that even the serger couldn't tame runaway ravels.
  • It probably is NOT a good idea to cut drapery fabric on the crossgrain just to get the slubs to run vertically in the garment.  Also, NOT a wise idea to cut the collar on the the straight of grain just to get the slubs to run horizontally.  It just seems right to have the the lines moving those directions -- but I fear for the drape (no pun intended) of the garment.  
  • A hem that has been cut on the crossgrain is going to need to be sewn by hand.  Trying to use the machine makes for ripples and ridges that should only be in potato chips.
The best thing I learned is either that I can tackle and conquer some ambitious tasks ... or .... how good it feels to be finished.

Right now, I have to say it feels GREAT to be finished.  When I rest up a bit I will put on my own garments so I can post those pics.

Sunday, August 22, 2010

Button, Button .... WHICH button???????

Another garment for the style show almost finished -- but I can't decide which buttons to use ....

On one hand I like the scale, color match, and feminity of this one

Click photo to enlarge

On the other hand, my original thought was to use taupe to coordinate with the rolled hem that I put on the edge of the collar ...

Click photo to enlarge

Sometimes decisions are the most difficult part of sewing!  

Please leave a comment to voice your opinion ... otherwise I'll have to flip a coin.

Saturday, August 21, 2010

the Good, the Bad, and the .....

FINISHED!  Another outfit for the style show!

The GOOD
  • 3 more garments are checked off as DONE!  (actually 4 since I made a half slip to go under the skirt)
  • challis -- beautiful drape, lovely ruffles
  • chiffon -- beautiful drape, great as a wrap
  • colors -- luv em!
  • a rotary cutter, a ruffler, and a serger -- lifesavers
The BAD
  •  challis -- lovely to wear but not as much fun to cut --garment pieces weren't too bad, but for stability I pinned the fabric to tissue paper before cutting strips for the ruffles
  • chiffon -- lovely to wear but NO fun to cut -- again, more tissue paper used to stabilize the fabric even after I had given it a hefty dose of heavy duty spray starch and pressing (tip: cover the ironing board cover first with an old towel)
  • 222" of ruffle -- need I say more? (that's 18.5 feet or 6.167 yards)
  • print -- a one-way print so had to make sure the tulips were used so they are supported by their stems and not hanging from them
  • fabrics that look "almost" the same on the right/wrong, fashion/reverse sides ... close enough to get them mixed up, different enough that every seam was checked twice before stitching
  • 45" fabric -- could only get one cardiwrap front out at one cutting so more work to stabilize and keep it all from dragging off the cutting table
 The FINISHED  (one of the most "beautiful" words in the language)

A sleeveless shell, a gathered skirt with a shaped hemline and 5" ruffle at a 3:1 ratio and rolled hemline (both top and bottom of the ruffle), and a cardiwrap with a shell edging.


There are a couple options for wearing this cardiwrap, I think our model will probably tie the front.

I should have pressed this again before taking the pictures but promise to do so before the style show.

Tuesday, August 3, 2010

What not to wear ...

... when sewing eyelash sparkle knit? 

.... duh ... black pants .... ask me how I know?

It's fun sewing a cardiwrap for a little girl -- especially if it can be cut from only a half yard of fabric (she's 4).

Here is the little cardiwrap that I stabilized the shoulders and back neckline with fusible bias stay tape (I used Design Plus) and then the shell stitch to finish the edges and hemlines.  The edging really gets lost with the eyelash so it was more a matter of just having a stable finish.


I don't know which is more challenging -- sewing the small garments or trying to figure out how to photograph them.  They don't fit on the dress form so we'll just have to be content with hanger and use our imaginations to put them on a little cutie pie.


Now, where is my lint brush?


Oooh la la

Yesterday was a double-edged sword ... working on an editing project that took all day and then some ... 11.5 hours at the computer but that will help this month's invoicing.  So today it felt so good to be able to stitch up a couple of quick garments for the TCC style show at Novi .  Two more off my To Do list as Done!

I worked on the little girl's sleeveless shell and her wool skirt.  Doesn't everyone else work with wool on a 90-degree August day?  Makes you have empathy for the sheep.


The skirt design wasn't my idea and I was given the task of putting a 2:1 ruffle on the bottom.  No big deal but I wasn't so sure how that would work with the wool--it came out just fine. First I serge finished the top of the ruffle that would be sewn to the skirt and then I did a serger rolled hem (3 thread) with just plain old serger thread on the bottom of the ruffle.  Next I went back to the sewing machine to play with my new ruffler and used the pleating setting.


Lucky for me that the width of the fabric worked out to be "almost" perfect for the size of the skirt to do the ruffle with no seaming.  Fortunately I left enough thread at both ends of the ruffle so I could work it out just a little bit (about 2") so that it matched the skirt perfectly.

Now I don't know about you, but I can't wear wool.  Even blends.  So I decided this skirt should have a lining (I actually put in an underlining which I thought was quicker).  Every girl needs a few secrets that make her smile -- and the lining of this skirt is one of those.  I hope the little girl who is getting this skirt will smile whenever she gets dressed.  I just hope her mom doesn't have to convince her she can't wear it inside out!


I serged the underlining to the wool at the bottom seamline and then added the pleated ruffle.  It was just too much for me to try to do all that in only one step.

The outfit has one more piece coming -- a fun little cardiwrap -- so something to look forward to!

Sunday, July 25, 2010

Definitely making progress

The skirt is finished .... and it looks deceptively easy ...  with the help of the serger (rolled hem on a 146" ruffle), ruffler (a 2:1 ratio of ruffle to skirt circumference, invisible zipper foot, stitch in the ditch foot  (topstitching/edgestitching on the waistband), and the sensor buttonhole foot.

Loving my Janome today!


Here are the three pieces put together

zippity do dah!

I used to be terrified of invisible zippers ... that was when I tried to use the plastic foot sold next to the zippers at the fabric store.  Then I invested in one of the metal feet that snaps onto the sewing machine (mine is Janome).

The current problem project is a skirt that will have its waistline gathered into a fitted waistband with a 3" ruffle at the hemline.   The challenge is not the pattern but the fabric.  It is a beautiful knit -- not slinky -- but more of a jersey with some lycra in it.  I was afraid that if I put in a lapped zipper that the topstitching would ripple.  I was also afraid that even using an invisible zipper would cause ripples.

I am so happy with the way the zipper installed that I just have to show you!  I cut some strips of fusible knit interfacing, one inch wide even though I am using a 5/8" seam allowance.  The zipper sewed in so nicely with no hint of a ripple. 

If you didn't see the zipper pull as a clue, could you find the zipper?

Now the next challenge is stabilizing the waistband and finishing up another garment for the style show.

Friday, July 16, 2010

On the straight and narrow

Yesterday I decided to cut out several of the final garments for the style show.  With the garment I'm going to talk about here I was definitely transported back in time to when my mom first taught me to lay out patterns and to use fabric to its best advantage.  Although then we called it "material" and not "fabric."  In those days we often bought remnants that might be a quarter yard short from what the pattern envelope told us we would need ... so we always, always, always laid out the pattern to make sure there would be fabric for everything before a single piece was cut.

When this fabric was pulled from Kat's stash,  it looked like there was puh-lenty of yardage.  Then when I got it out yesterday,  I discovered a couple things -- first, it wasn't as wide as I had thought.  I sure am used to everything being 60" wide these days.  Remember 45"?  36"?  This was about 40" wide -- so no possibility of staggering pieces in the layout.

We all know that there is a right side and a wrong side to fabric. Or, there can be "one" side and the "other" side.  In this case we coordinated colors with a print for the skirt and this fabric now has a "outside/fashion" side and an "inside."  The orange has an interesting weave and the brown feels like it may be a wool jersey (or blend).  That meant to keep the herringbone weave on the outside going straight I needed to pin along the stripe ... wow did we lose yardage at both ends when the fabric was trued up with the line and the selvages.  NEVER trust a crossgrain edge that has been cut.


I always learn a lesson from every project, even if I don't learn it in time to apply it to that project.  In hindsight, what I would do next time is that after I pin the straight line along the fold, I would slip some tissue paper in between the layers to keep the two sides from clinging.  However, my fold was now straight and my selvages were lined up (and the stripe did follow straight along the selvage -- I did think to check that) so I think the garment will be ok.

It was a little like a jigsaw puzzle deciding which order to place the pieces.  If I had started at either end with the back, I wouldn't have had enough fabric.  By starting with the front on one end, I was able to take advantage of more yardage at the fold and didn't worry about where it ran short at the selvage.


Then I cut the the back from the middle -- without any extra breathing room between the back and the front.  You can see that the hem is right at the top of the shoulder line.


And finally came the sleeve -- thanks to the shape of a sleeve, I was able to just get the cap.  Although I took the picture from the other end of the table, I did lay out the garment "with nap" even though I don't think that will be an issue with this fabric.  Meaning, the pattern pieces were all put on the fabric in the same direction, top to bottom.


Since that layout worked, I cut the pieces.  If it hadn't worked, I might have tried starting with the back at one end and flipping over the front pattern piece to take advantage of some waste area.  Nothing says the pieces have to be cut so you can read the printing -- when you are cutting two, you have the same end result.  I would rather flip pieces than to change direction of the layout.

This cardiwrap already had no hem allowance since I will be doing another shell stitch application for finishing the edges.  So my other options would have been only to shorten the cardiwrap or to find other fabric.  Thanks to patience and determination I didn't have to do either. 
 
Of course, I could have tried cutting the pieces out of a single layer and aligning the straight of grain line with the stripe. But this way I didn't risk ending up with two left sleeves  .... 

Thursday, July 15, 2010

Make that 2 dozen -- to go!

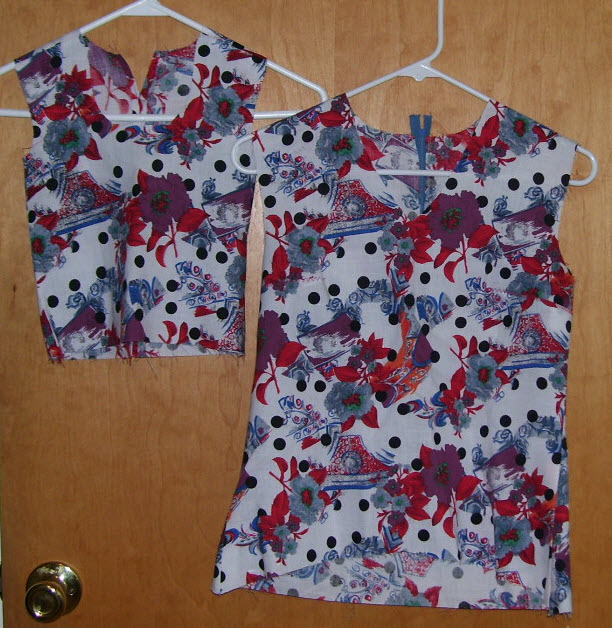
Now here are two really ugly dresses .... I was trying to approximate the weight of the real fabric, not the look.

These were quick and dirty constructions -- cut at the hem line, zippers sewn to the top of the fabric and slit underneath, no facings .....  they will check fit and give us some info on our ideas for the collars.

These are both shoulder princess dresses and the princess lines sewed together beautifully

One has a vee neckline with a collar that will go halfway down the neckline.  It also has an elbow-length sleeve that has slight shaping at its hemline.  I didn't realize just HOW shiny this one was until I put it onto the dress form.  The real one will be a sophisticated muted gold with a matte finish and wonderful drape (I think the real one is silk instead of whatever science project this one is).


The other has an exaggerated turtleneck on a scoop neckline -- the bottom of the sleeves will be gathered into a cuff for a full sleeve.  The real one will be a solid maroon in a crinkle finish fabric and it will have an invisible zipper in the center back seam

These are "fun" ones --the next generation will be the sophisticated versions.  Only one more test to make ... let's see .... today til Sept 20 ....  TODAY'S COUNT -- total garments needed:  26 including the test -- total garments finished:  2 ....

That means 24 to go!

Monday, July 12, 2010

More test garments

These are test garments only -- just to send off to the models so they can check the fit -- we have their measurements ... or what their measurements were on the day they were taken.  Having these test garments at their end will assure us that the measurements are still valid.  They can try them on and know that they have to STAY those measurements at least until the end of  September.

Of course that will be more difficult with a 4 y.o. girl -- we all know kids have growth spurts so I will wait to sew her actual garments until early September.

These are simple little sleeveless blouses to be worn under their real cardiwraps (tests previously posted).  The real fabrics are much prettier -- I promise!  The little girl will be wearing a lavender color palette and the blouse will be a nice muted batik with a fun fluffy knit for the cardiwrap.  The young adult will be wearing a buttery yellow solid in a nice challis for the blouse and the cardiwrap is a bold red/orange/brown print (bold in intensity of color, not size of print) that is a fluid fabric, semisheer.  More about the skirts below.

The little girl's skirt is going to be from a pretty lavender wool with a 2" pleated ruffle around the bottom.  The other is from the same yellow fabric as the top and it will have great draping.  You can see that the hemline slopes (intentionally) from front to back and it will be finished off with a 5" ruffle.  I bought a new ruffler attachment for my Janome 6600 just to do these ruffles.

Watch for pictures of the real garments -- but not til sometime in August/September

Saturday, June 19, 2010

What a week! Style show planning

Sorry no pictures -- yet --

I just returned home from a SEAM Team work week at the TCC home office in the Chicago area.  We were working on planning for a style show at this year's American Sewing Expo in Novi, Michigan.

We have been bumped up from a half hour show to an hour!  There are seven volunteer models who have promised to keep their measurements stable and we have around 90 garments/items (some are purses)  planned with 6 of us doing the sewing.


We have measurement charts for all and skimmers (fitting garments) have been proven out.  This week we planned the garments, printed many of the patterns, and did our fabric shopping.  First we decided a focus for every round (there are 12), then assigned models to the rounds, chose garments, and finally paired fabric with the patterns.  Not only do the fabrics need to complement the models' complexions (most are Autumns) but they need to also complement the other garments in the round.  Somehow we think we have a good working plan.

I came home with patterns to tape,  bags of gorgeous fabrics, and a mission of 18 garments for my share.  Add to that some personal garments to wear for the 3 days of working in our booth in the vendors mall.  Why does September 20 (my deadline for ALL garment construction) sound so far and yet so soon?

That's roughly a finished garment every three days if you figure in everything else that comes with summer --esp  mowing and weeding -- plus regular work on editing & QC projects, TCC user group meetings, ASG meetings, and two sewing expos coming to Cincinnati where I can take classes.  YIKES!

.... more to come ... I'll try to post my progress and give you a sneak peek with a behind-the-scenes look at organized chaos   .....

... now to have my morning coffee and it's off to my TCC users' group meeting to show them all my swatches!